How to Level a 3D Printer Bed Without Wasting a Whole Spool
Level a 3D printer bed by cleaning the plate, setting a consistent nozzle gap, and locking Z-offset. Keep a basic tools kit and thin glue ready for glass plates that still skate after the gap is right.
By Harper Lin
3Dprintpicks is reader-supported. As an Amazon Associate we earn from qualifying purchases. Learn more.
The short answer: Clean the plate, heat the bed, and set a consistent nozzle gap before you touch glue. Keep the HAWKUNG 35-Piece Tool Kit (paid link) for cleanup and nozzle needles, and save Elmer's Disappearing Purple School Glue Sticks (paid link) for glass or slick sheets that still skate after the gap is right.
Our picks
A bad first layer wastes more filament than almost any other home-printer habit. Leveling is not mystical. It is a clean plate, a known gap, and one test square you actually watch. Browse more bench tools in our accessories hub. For the wider tune order after the bed is flat, use 3D printer calibration.
Clean before you turn a single knob
Oil from fingers and old glue make a perfect gap look sticky in one corner and dead in another. Wash textured PEI with warm water and a drop of dish soap, then dry it. Skip acetone on coatings that hate it. If the sheet is gouged, replace it instead of chasing knobs forever. See 3D printer build plate.
Heat the bed and nozzle to the temperatures you will print at. Cold metal expands when it warms. A cold level can drift once the plate is hot.
Set the same gap at every corner
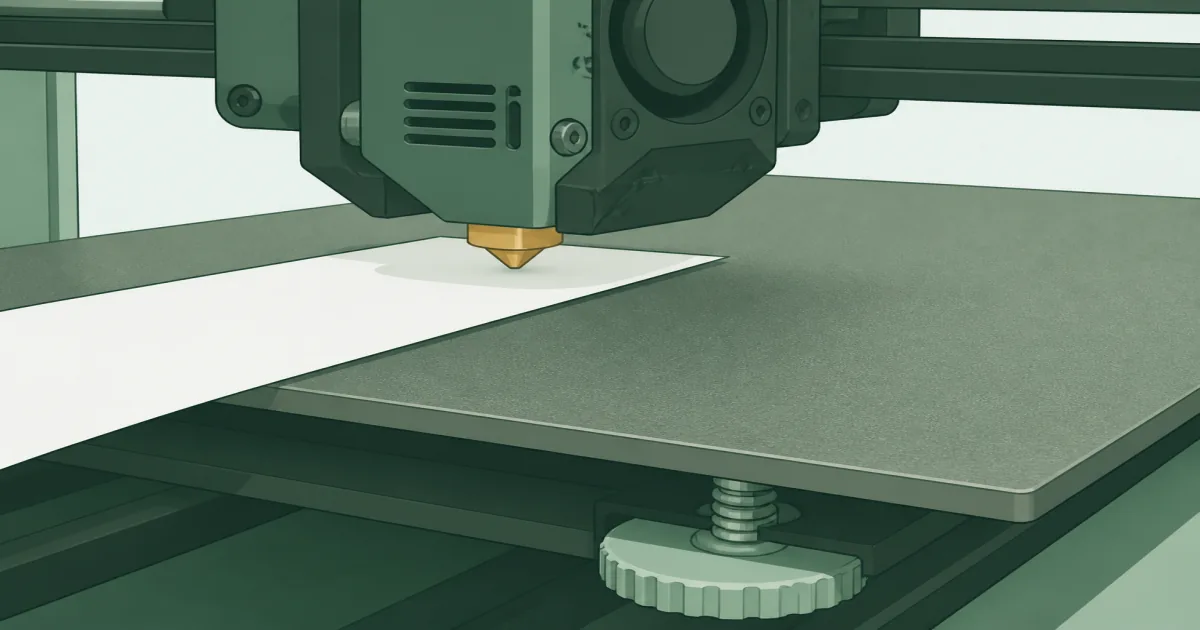
Home the axes. Disable software mesh compensation if your firmware lets you while you tram the bed. Move the nozzle to each corner and the center. Slide a clean sheet of paper or a thin feeler blade under the tip until you feel light drag, not a scrape that lifts the gantry.
Match that drag everywhere. Large beds need more patience than mini printers. If one corner always fights you, check the frame, eccentric nuts, and whether the plate sits flat on the magnet.
Keep the HAWKUNG 35-Piece Tool Kit (paid link) nearby for scraping failed test squares and clearing a dirty nozzle that can fake a bad level. More kit options sit in 3D printer tools kit.
Lock Z-offset with a one-layer square
After the corners agree, print a single-layer square or first-layer test. Look for:
- Gaps between lines means the nozzle is too high
- Ridges that mash together and scrape means too low
- Even satin lines with slight bonding means you are close
Adjust Z-offset in small steps. Change one thing at a time. If you raise the bed on a knob printer, recheck the neighbors so you do not create a new high corner.
Glue is backup, not the leveling step
When the gap is right and clean textured PEI still will not hold, then add a thin film from Elmer's Disappearing Purple School Glue Sticks (paid link) on glass or slick plates. Wash it off when the job ends. Do not bury a crooked bed under a thick glue lake. Details live in 3D printer glue stick.
Remove stuck parts with a safe scraper after the bed cools. Digging under a hot part is how sheets get scars that ruin the next level.
Auto bed leveling still needs a sane tram
Probe meshes smooth small waves. They do not forgive a bed that is tilted like a ramp. After you move the printer or swap the plate, re-tram first, then run the probe routine your firmware expects.
If first layers fail only after long idle weeks, recheck the gap before you rewrite the whole slicer profile. Belts and mounts settle. The bed is still the first suspect.
A short leveling checklist
- Wash and dry the plate
- Heat bed and nozzle to print temps
- Set matching paper or feeler drag at corners and center
- Print a one-layer square and tune Z-offset
- Add glue only if the plate type still needs it
- Save the working offset and stop turning knobs
That loop beats buying another printer because “PLA will not stick.”
Signs the bed is not the real problem
Wet filament pops and strings even on a perfect first layer. A worn brass nozzle extrudes thin lines that look like a high Z-offset. A warped cheap sheet will never tram flat no matter how long you turn knobs. Fix those before you buy a second printer.
If only one material lifts, read the adhesion notes for that filament instead of re-leveling every color. PETG on glass often wants different habits than PLA on textured PEI. The glue stick page covers when a thin film helps and when soap is enough.
After the bed is honest
Once squares stick, leave the leveling menu alone. Move to temperature and flow in 3D printer calibration. Measure parts that must fit with a caliper only after the first layer is boring in a good way.
Keep the tools kit, a labeled spare nozzle, and a clean scraper in the same drawer. The next failure at midnight should not send you to the kitchen knife again. More kit options live in 3D printer tools kit.
Soft CTA
New to the hobby and still choosing a machine? Start with best 3D printer for beginners, then return here when the first layer fights you. Browse more accessories on the blog or from the homepage at /.
Bottom line
Level the bed with a clean plate and a repeatable gap. Keep the HAWKUNG 35-Piece Tool Kit (paid link) for cleanup, and save Elmer's Disappearing Purple for the few plates that still need a thin film after the nozzle height is honest. Then move on to flow and temperature in the full calibration guide instead of living on the leveling menu.
Frequently Asked Questions
How do I level a 3D printer bed?
Heat the bed and nozzle to print temps, clean the plate, then set the same nozzle gap at each corner and center. Lock Z-offset, print a one-layer square, and adjust only what the square shows.
Paper or a feeler blade?
Clean printer paper works for most home desks. A marked feeler blade is more repeatable when you want the same gap every time. Start near 0.1 mm and tune to your nozzle and first-layer height.
Why do corners still lift after leveling?
Drafts, a dirty plate, wet filament, and a warped sheet can lift corners even when the gap looks fine. Wash the bed and recheck one corner at a time.
Do auto-level printers need this?
Yes for the first mechanical tram and after you move the printer. Mesh leveling helps, but a badly tilted bed still fights the probe.
When should I add glue?
After the gap is right. Glue will not fix a nozzle that is too high. See 3D printer glue stick.
How is this different from full calibration?
Bed leveling is the first-layer gap. Full calibration also covers flow, temperature, and dimensions. See 3D printer calibration.
How often should I re-level?
After moving the printer, changing the plate, or when first layers suddenly fail. Do not re-level after every tiny scar on a good print.